Creating a SharePoint Sequential Visual Studio Workflow (2 or n Level)
In the below steps with screenshots, you will create sequential visual studio workflow with 2 level of approval. (you can use the same logic for n level of approval)
Click here to read my previous post for Creating a SharePoint Sequential Visual Studio Workflow (1 Level)
Whenever a document is uploaded to any list/library, a workflow has to be triggered for 2 levels of approval.
1.Open Visual studio (Run as administrator).
Select sequential workflow under SharePoint 2010 template. Enter the project name

2. Enter your site address and select farm solution and click next

3. Select List workflow and click next

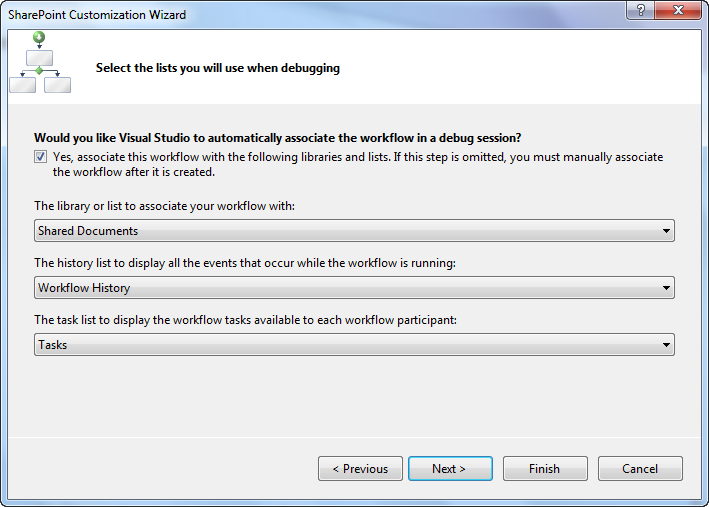
4. Select the list , in our case Shared Documents.
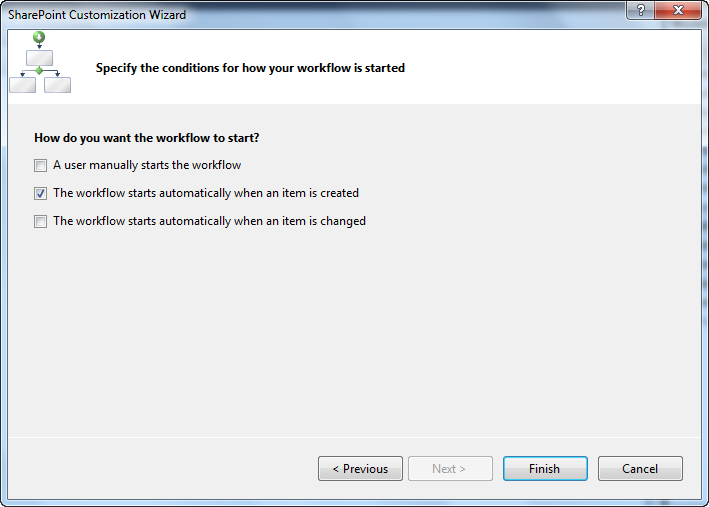
5. A workflow can be started (triggered) in 3 ways:
a) Manually
b) When item is created
c) When item is updated
Select 'when an item created' and click finish
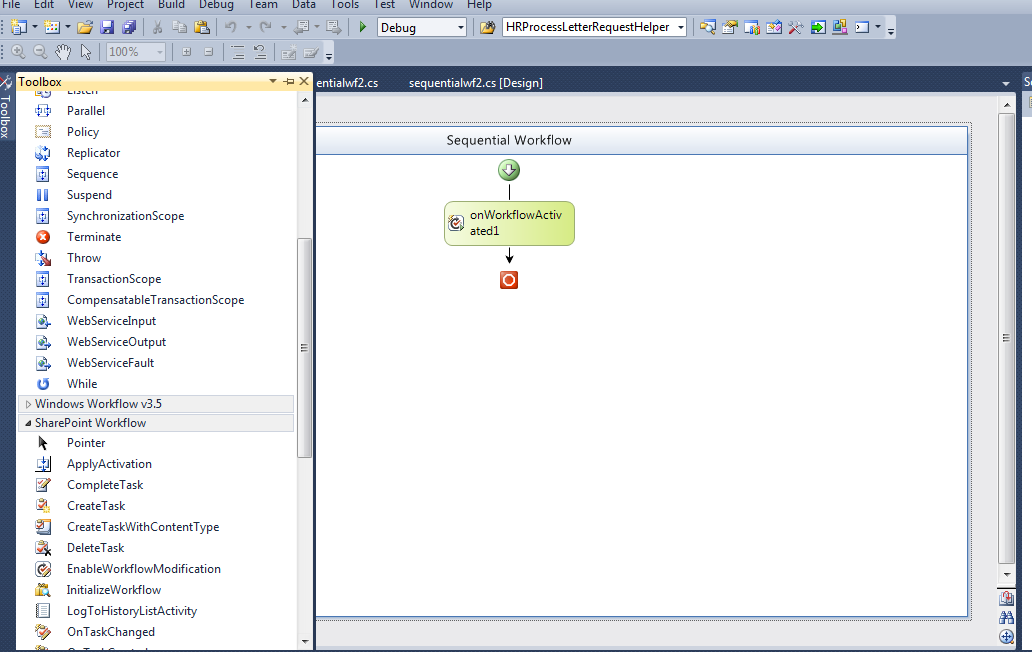
6. Now you can see the screen as below with your workflow design and toolbox at left side.
7. Use the toolbox and drag and drop Create Task, While Activity, Sequential Activity and On TaskChanged to your workflow design, so your final design will look as below.
Since WhileActivity can have only one element below it, we are using SequenceActivity to put multiple elements

8. Select CrateTask1 and hit F4, it would open properties page as below.
Type the Correlation token as "TaskToken" and owner activity would be name of parent element. (SequenceActivity). (Do not give WhileActivity as OwnerActivity)


10. Repeat the above step for "Task Properties" in the properties panel of "CreateTask1".
11. Select OnTaskChanged1 and press F4, Properties panel will open as below
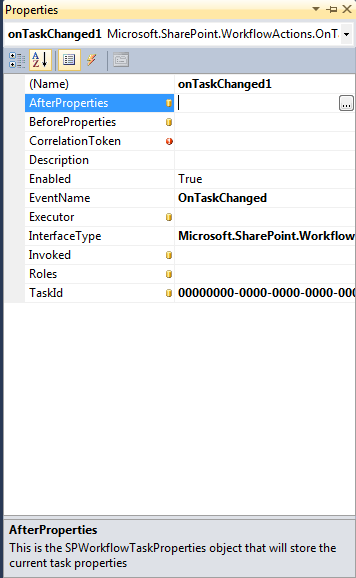
12. Select AfterProperties and click on the bubble appearing at the end.
Select "Bind to a new member" and hit "Create Field". click OK

13. Repeat above step for "BeforeProperties" property of the "OnTaskChanged1".


21. Now your workflow is ready.! Build, Deploy and open you site .
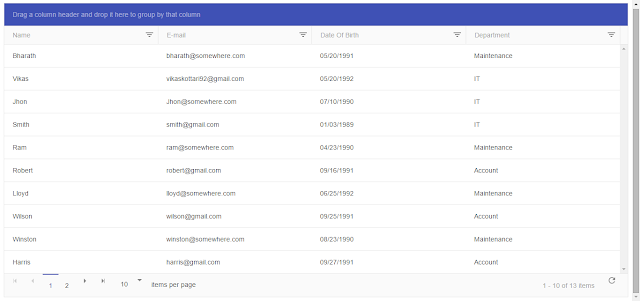
22. Go to Shared Documents and upload some document

23. Now you can see your workflow showing in a new column with status as InProgress Since we have selected workflow to begin "when an item created"

24. Click on InProgress and it will open the WorkFlow properties. Edit the created task as shown.
 25. Enter 100 for %Complete field and Save

26. As you can see, the task has been created for the next approver.
 27. Edit it as we have done previously, make the %complete to 100 and save.
Now go back to the list. As you can see the workflow is Completed.

The workflow is complete since we had 2 levels of approval, we can use the same workflow for n number of approvals.
Happy coding :)
Click here to read my previous post for Creating a SharePoint Sequential Visual Studio Workflow (1 Level)
Whenever a document is uploaded to any list/library, a workflow has to be triggered for 2 levels of approval.
1.Open Visual studio (Run as administrator).
Select sequential workflow under SharePoint 2010 template. Enter the project name

2. Enter your site address and select farm solution and click next

3. Select List workflow and click next

4. Select the list , in our case Shared Documents.

5. A workflow can be started (triggered) in 3 ways:
a) Manually
b) When item is created
c) When item is updated
Select 'when an item created' and click finish

6. Now you can see the screen as below with your workflow design and toolbox at left side.

7. Use the toolbox and drag and drop Create Task, While Activity, Sequential Activity and On TaskChanged to your workflow design, so your final design will look as below.
Since WhileActivity can have only one element below it, we are using SequenceActivity to put multiple elements

8. Select CrateTask1 and hit F4, it would open properties page as below.
Type the Correlation token as "TaskToken" and owner activity would be name of parent element. (SequenceActivity). (Do not give WhileActivity as OwnerActivity)

9. Click taskId, click on the small bubble that appears an t the end or
double click on small yellow box. Below screen would appear and select
"Bind to a new member" and hit "Create Field". click OK

11. Select OnTaskChanged1 and press F4, Properties panel will open as below

12. Select AfterProperties and click on the bubble appearing at the end.
Select "Bind to a new member" and hit "Create Field". click OK

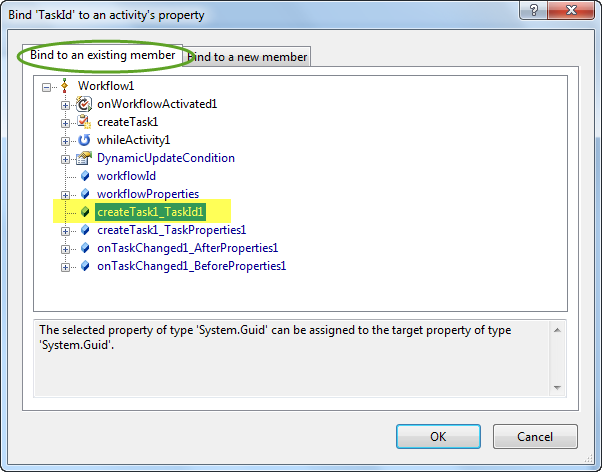
14. Select "TaskId" for the "OnTaskChanged1" by clicking the bubble,
Select "Bind to an existing member" select the createTask1_TaskId1". 
15. Select "Correlation Token" and select the previously entered tasktoken from the dropdown.

Now we are done with the workflow design part.
16. Now double click on "OnWorkflowActivated1"
Add the below code in generated method.public bool isWhileCondition;public int NumberOfApprovals;
public int CurrentApprovalLevel;
List<string> assigneeList = new List<string>() { @"domain\user1", @"domain\user2" };
private void onWorkflowActivated1_Invoked(object sender, ExternalDataEventArgs e)
{
NumberOfApprovals = assigneeList.Count;
CurrentApprovalLevel = 1;
}
17. Go back to your design page and double click on "CreateTask1", add the below code in the generated methodpublic bool isWhileCondition;public int NumberOfApprovals;
public int CurrentApprovalLevel;
List<string> assigneeList = new List<string>() { @"domain\user1", @"domain\user2" };
Add these 4 lines above the method. Add list of users to the list, you can add more users if requires multilevels of approval.
Also you can get these list of users for SharePoint List.
private void createTask1_MethodInvoking(object sender, EventArgs e)18 . Go back to your design page and double click on "OnTaskChanged1", add the below code in the generated method
{
createTask1_TaskId1 = Guid.NewGuid();
createTask1_TaskProperties1.Title = "approval";
createTask1_TaskProperties1.AssignedTo = assigneeList[CurrentApprovalLevel - 1];
createTask1_TaskProperties1.Description = "test desc";
}
private void onTaskChanged1_Invoked(object sender, ExternalDataEventArgs e)19. Go to the code behind and add the below code
{
if (onTaskChanged1.AfterProperties.PercentComplete == 1.0)
{
CurrentApprovalLevel++;
}
}
private void isWhile(object sender, ConditionalEventArgs e)20. Now go back to design page and select "WhileActivity1" , hit F4, Select Code Condition for "Condition", expand it and Select isWhile
{
e.Result = NumberOfApprovals >= CurrentApprovalLevel;
}

21. Now your workflow is ready.! Build, Deploy and open you site .
22. Go to Shared Documents and upload some document

23. Now you can see your workflow showing in a new column with status as InProgress Since we have selected workflow to begin "when an item created"

24. Click on InProgress and it will open the WorkFlow properties. Edit the created task as shown.


26. As you can see, the task has been created for the next approver.

Now go back to the list. As you can see the workflow is Completed.

The workflow is complete since we had 2 levels of approval, we can use the same workflow for n number of approvals.
Happy coding :)
Comments
Post a Comment